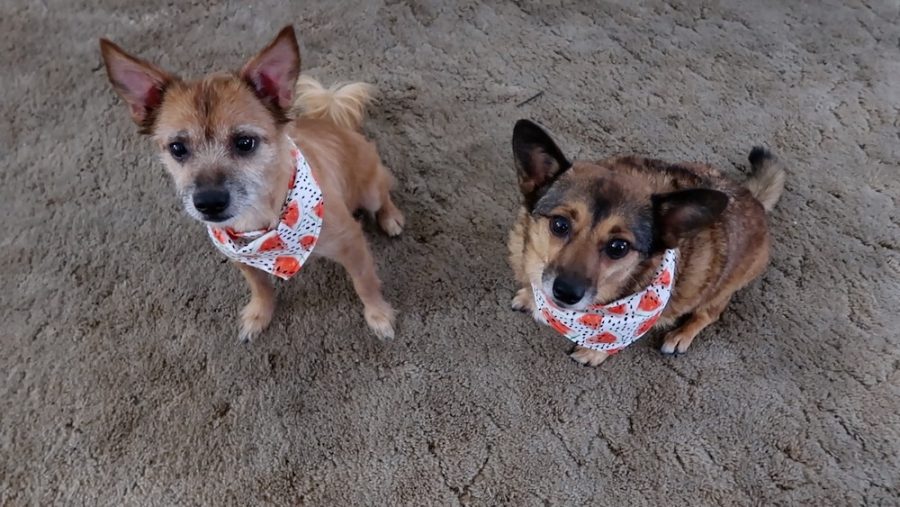
Have you ever wanted to make your own homemade DIY dog collar but didn’t know where to start?
This mid-level craft will show you how to design and sew your very own customized dog collar using your favorite fabric pattern!
DIY Dog Collar Craft
- Difficulty: Medium
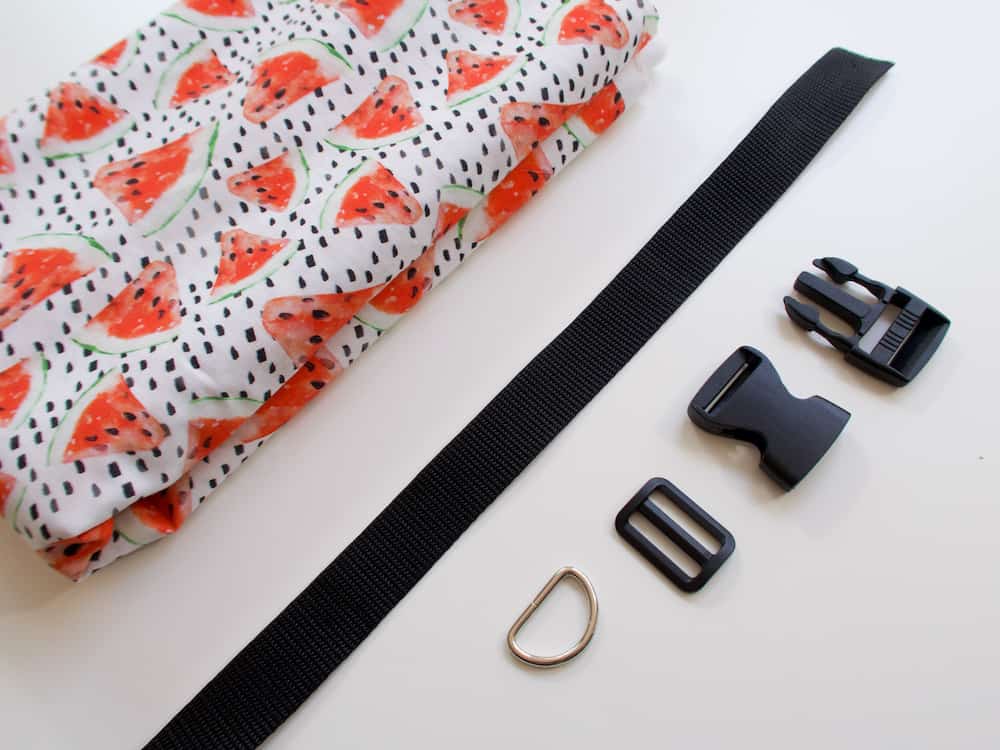
Supplies:
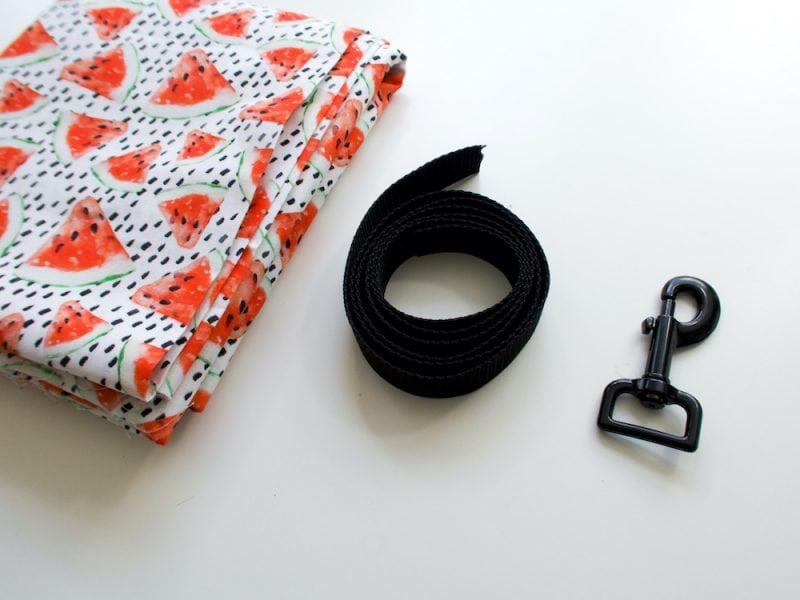
- Cotton Fabric
- Buckle (we recommend Strapworks buckle)**
- Tri-Glide – see purchase option
- D-Ring – see purchase option
- Nylon Webbing Strap – see purchase option
*Strap & All Hardware used were 1”
**Any buckle can work for this project, but we’ve found that Strapworks offers the best quality buckles. Note that a sturdy buckle is especially important for dogs who pull. If you have any concerns about tugging and pulling on the collar I recommend spending more for sturdier hardware pieces and using a heavy-duty thread.
Directions:
Creating your own dog collar is a lot easier than you’d think and gives you more flexibility for fun designs versus the limited store bought options.

First cut the nylon webbing strap to length. I cut mine about double the length of my dog’s collar which ended up being around 33” long.

Next take a lighter to burn each end so the edges don’t fray.

Next cut your fabric about 3.75” wide and long enough to cover the length of the strap (~34” – 35”).

On one edge of the fabric (I did this along the selvedge edge) press 1” fold.

I sewed a basting stitch as a guide 2” from this pressed hem. Flip the fabric over and press along this basting stitch towards the other fold, removing this stitch after you iron. You can omit the basting stitch and just use the iron to press these guides if you prefer!


Next up we’re going to sew the fabric onto the strap. First tuck the nylon strap neatly under the 1” fold.

Then fold the other side of the fabric up so the entire strap is covered. If done correctly the folded over pressed edge will get close to the end of the strap but will not overlap.


I suggest using binder clips instead of pins to hold the strap together and sew around the entire piece making sure to fold over and tuck in the edges at the two ends. Essentially we are sewing a very thin and long rectangle using the presser foot as a guide to keep the seams close to the edge.


Once you have the nylon strap covered in fabric it’s time to assemble the collar. First up is the tri-glide and pronged side of the buckle.

Slide in the tri-glide clip around the middle of the collar – this is what makes it adjustable.

Next pull the strap through the pronged side of the buckle.

Loosen the part of the strap that was pulled through the tri-glide clip. We are going to pull the strap under and over underneath the first strap doubling this part up.

Next sew the end of the strap to the inside part of the loop securing this in place.

Whenever I sewed the straps together, I made sure to sew a rectangle with an X through it and went over this a couple of times to create a more secure stitch.
*For added security you can use heavy duty thread and create more than one seam if desired.

Next up is the D-ring and the other side of the buckle.

First slide the D-ring through the other end of the strap, then pull the strap through the buckle. I pulled through until I had about 3.5” – 4” of excess strap on the back.
You need a bit of excess strap because you will need to secure the D-ring in place by sewing on either side of where you want this ring to sit.

Like the other end – I secured this with a rectangular stitch that crossed through the center.
Adjust the collar to fit your pup and you’re finished!


This may seem a bit complicated at first, but it was pretty easy to assemble and is a fun way to switch up your dog’s accessories!


Leave a Comment