DIY Dog Leash Tutorial
Learn how to make your very own dog leash for your pup!
- Difficulty: Easy
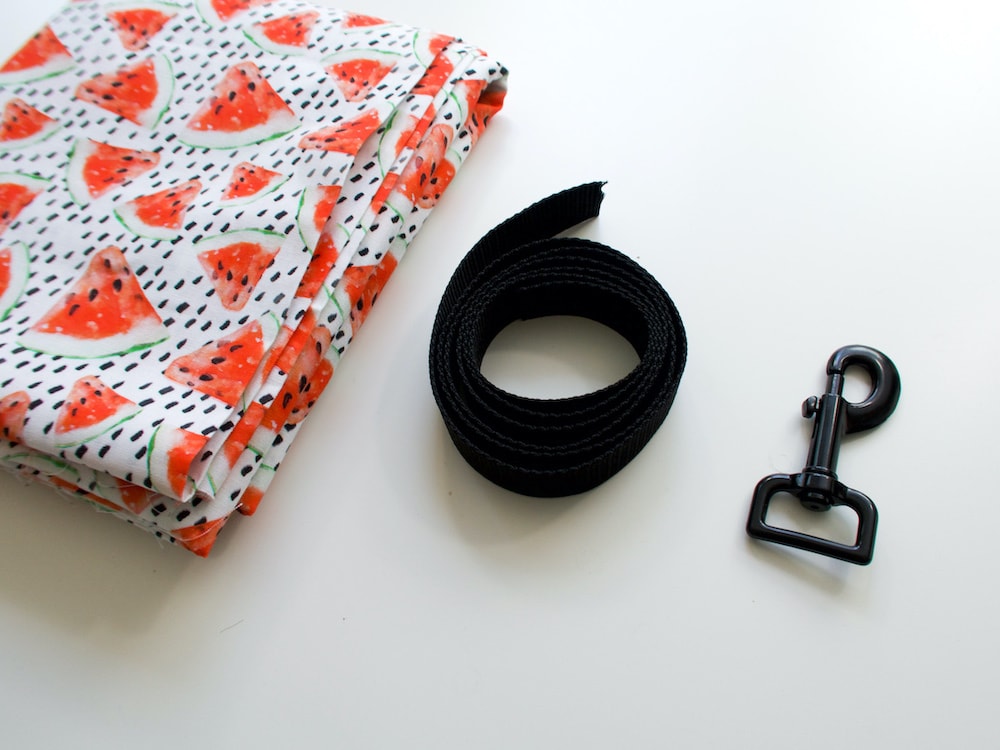
Supplies Needed:
- Cotton fabric
- Bolt snap
- Nylon webbing strap
*The strap and hardware I used were 1 inch thick.
Directions:
If you haven’t seen it already, I also created a tutorial on how to create a dog collar. This is much simpler, so if you were able to follow along the collar tutorial the leash should be easy for you to make!

First, cut the nylon webbing strap to length. I cut mine about 53.5 inches long. Next, use a lighter to burn each end so the edges don’t fray.

Next, cut your fabric about 3.75 inches wide and long enough to cover the length of the strap (approximately 54.5 to 55 inches).

On one edge of the fabric, press a 1-inch fold.

I sewed a basting stitch as a guide 2 inches from this pressed hem. Flip the fabric over and press along this basting stitch toward the other fold. Remove this stitch after you iron.
You can omit the basting stitch and just use the iron to press these guides if you prefer!


Next up, we’re going to sew the fabric onto the strap.
First, tuck the nylon strap neatly under the 1-inch fold.

Then, fold the other side of the fabric up so the entire strap is covered. If done correctly, the folded-over pressed edge will get close to the end of the strap without overlapping.


I used binder clips instead of pins to hold my strap together and sewed around the entire piece, making sure to fold over and tuck in the edges at the two ends. Essentially, I sewed a very thin and long rectangle using the presser foot as my guide to keep my seams close to the edge.


To finish your leash you’ll need to attach the bolt strap and create a handle.

On one end, pull the strap through the bolt snap about 2 inches. Next, sew the strap together to lock that bolt strap in place.
Like in the collar DIY, everytime I sew the strap together I made sure to sew a rectangle with a cross through it a couple of times for added security. If you are worried about durability, use a heavy duty thread and feel free to sew more than one seam to hold these two pieces together.
Finally, on the other end of the strap, you can sew your handle. I folded my strap over about 8 inches and secured this in place with the rectangular stitch near the end of the strap.


And you’re finished! This clips easily onto the D-ring of your dog’s collar. This is super easy to make and is a fun way to change up your dog’s accessories.


ADDITIONAL NOTES:
Sewing the fabric to the strap uses the same instructions as the collar, so the same photos will work!

Let us know how this project went for you in the comments!


Leave a Comment