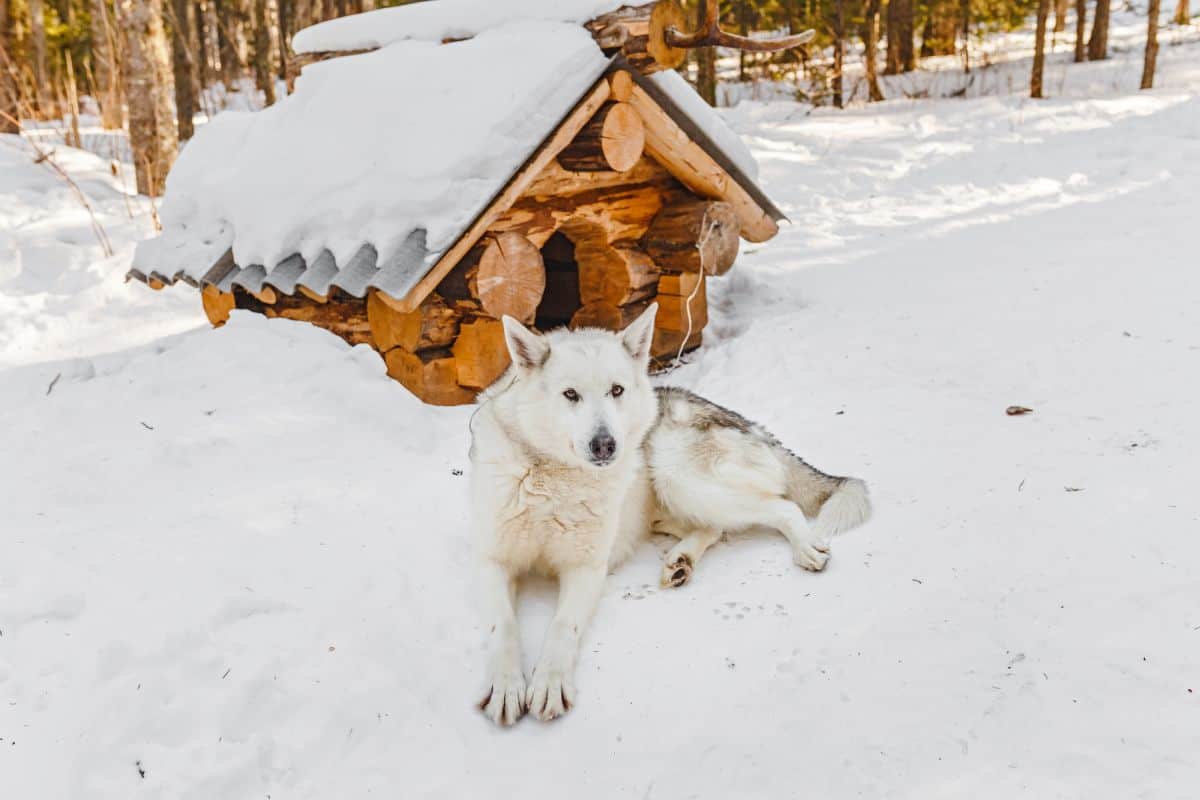
If your dog spends a lot of time hanging out in the backyard, it is important to make sure he has a good dog house that’ll give him a way to retreat from temperature extremes.
If you are starting from scratch, the easiest thing to do is just set your dog up with a dog house that is specifically designed to keep him warm.
We’ve talked about these kinds of dog houses before, so take a look at our guide to the best winter dog houses if this sounds like a good option for you and your pet.
You can physically warm up your dog’s house in a few different ways too – whether you want to use electricity to heat your dog’s house or not, there are several possibilities. The downside is that some of these methods are a bit complicated, so they aren’t viable options for all owners.
However, most owners should be able to insulate their dog’s house without too much effort. This will help keep your dog warmer in the winter, and it won’t cost you a fortune either.
We’ll talk about eight different ways – which primarily differ in terms of the materials you’ll need to use — to do so below.
Different Ways to Insulate Your Dog’s House
Note that a few of these options are pretty straightforward, while others are a bit more unusual and creative. We’ve tried to list the various options from the simplest to the most unusual.
It’s also important to point out that many of these insulating materials will need to be covered to prevent your dog from getting into physical contact with them.
The best way to do so is by cutting out wood or plastic panels which can then be installed on top of the insulating material. Alternatively, if your dog’s house has hollow walls, you can often stuff the insulating material inside this space.
1. Fiberglass Insulation
Fiberglass insulation – the pink stuff you see in your attic – is a great option for your dog’s house.
It’s reasonably affordable and very easy to install; plus it’ll keep your dog’s house cozier than many of the other materials on this list.
And, unlike many other materials, you won’t need to use a table saw to cut it – a pair of heavy-duty scissors will suffice.
However, fiberglass insulation is pretty irritating to the skin (and lungs, if the fibers become airborne), so you’ll need to take precautions while you work with this material.
Additionally, you’ll want to keep the insulation sealed up in a way that prevents your dog from coming in contact with it. If your dog’s house features hollow walls, you can just stuff it inside.
If the walls of your dog’s house are solid, you’ll need to tack or staple the fiberglass fabric to the inside of the walls and then cover it with plastic or wood panels.
2. Reflective Foil
There are several types of reflective foil on the market, which will help reflect your dog’s body heat right back at him.

Reflective insulation products are likely the best option for many dog owners as they’re easy to install, relatively affordable, and highly effective.
In fact, these types of foils can be used in conjunction with most other types of insulation. For example, if you wanted to use fiberglass insulation and foil, you could begin by adhering the foil to the inside walls of your dog’s house, followed by a layer of fiberglass foam, and then wood or plastic panels to keep the fiberglass in place.
3. Bubble Wrap
Because it is essentially nothing more than a bunch of tiny air pockets, bubble wrap can make a great insulator. It’s also easy to install and won’t require you to use any special tools.
Note that we’re not talking about the bubble wrap that is used to package the stuff you buy on Amazon (although that would also work if you don’t have anything else available). We’re talking about special bubble wrap that is coated in a thin layer of aluminum and designed specifically for insulating applications.
You could tack, staple, or glue the bubble wrap in place. Just be sure that you seal up the bubble wrap behind some wood or plastic panels to prevent your dog from chewing it up or otherwise damaging it.
4. Polystyrene Foam
Polystyrene foam – better known by the brand name Styrofoam – is one of the most obvious materials to use when trying to insulate your dog’s house.
After all, polystyrene foam is used in a variety of insulating products, ranging from coffee cups to drink coolers. It’s also pretty cheap, readily available, and easy to work with.

However, Styrofoam is not the most durable material around, and it won’t last long in your dog’s house if you leave it exposed (some dogs may even chew on it, which is certainly not ideal).
The best way to use Styrofoam to insulate your dog’s house is by cutting a series of foam panels that match the inside walls, ceiling, and floor of the house. Tack, staple, or glue the panels in place, and then cover each panel with a similar-sized piece of wood or durable plastic.
5. Expanding Foam Spray
Foam sprays are pretty nifty products that will work really well for insulating your dog’s house. Admittedly, this will not be an especially affordable option for insulating large dog houses, but it may be cost effective for keeping small dog houses warm.

If you’re not sure why type to use, Great Stuff Insulating Foam Sealant is a good choice to start with.
You’ll want to start by cutting out a set of wood or plastic panels and attaching them to the inside of your dog’s house. You’ll need to leave a space in between the panels and the walls, as well as a few holes to spray the foam through.
If your dog’s house has hollow walls, you can forego making the panels and just fill the internal cavity with the foam. Just be sure to plan before you spray, as the foam will start expanding immediately.
6. Carpet
Carpet is another viable option for insulating your dog’s house.
It isn’t going to transform your dog’s house into a sauna, but it will help cut the winter chill a little bit – especially if you use some on the ground as well as the walls and ceiling.
Carpet isn’t extraordinarily cheap, but you won’t need much to cover the inside of your dog’s house. You may even be able to obtain discounted carpet from a local supplier if you are willing to use whatever color or pattern they have laying around, and you don’t mind working with odd sizes and pieces.
It’s probably wisest to use an outdoor carpet for the sake of durability, but long-fibered indoor carpets will trap more air, and therefore provide more warmth for your pet.
Stapling the carpet into place is probably the best way to install it, but you may be able to adhere lightweight carpets to the walls with a strong glue or adhesive.
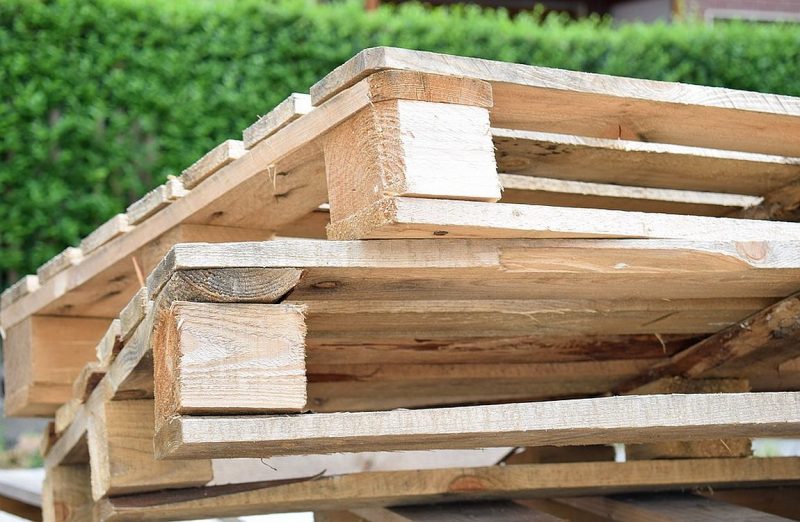
7. Wood
By itself, wood isn’t a fantastic insulator, but it is better than nothing, and it is pretty easy to install a set of wood panels in your dog’s house.
Additionally, if you maintain a small air gap between the dog house walls and the wooden panels you install, it’ll help provide additional insulating value.

To install the walls, just measure the interior dimensions of the doghouse and cut a panel for each of the three walls, as well as the roof and floor. Just be sure that you apply a high-quality water sealant to the wood before installing it. This will not only help the wood last longer, but it’ll also improve the insulating properties of the wood too.
The best woods to use in this application are soft woods, as they typically contain more small air pockets than hardwoods. So, look for pine or cedar lumber when using wood to insulate your dog’s house.
8. Water
This is admittedly an odd recommendation, but water is actually a very effective insulator.
It takes a lot of energy to warm water up, but once you do, it stays warm much longer than a similar quantity of air does. Water is also safe and essentially free, so it is definitely an attractive option to consider. However, because it is a liquid, it’s a bit tricky to use.
The best solution is probably to use a bunch of small water bottles and then use wood or plastic panels to keep the water bottles in place. You’ll have to use a bit of ingenuity when arranging the bottles, and you’ll want to ensure the cover panels fit snuggly to keep the bottles from shifting.
The water may freeze in really cold weather, but ice is also a pretty decent insulator, and you’ll want to bring your dog indoors in sub-freezing temperatures anyway. It’s also a good idea to empty a little of the water from each bottle before you install them, which will reduce the chances that they’ll burst if the water freezes.

Don’t Forget About the Cold Ground!
Insulating the walls and ceiling of your dog’s house is important, but it is also important to insulate your pooch from the cold ground below. This is typically easier than insulating the walls, and there are plenty of things you can use for this purpose.
Some of the best things to cover the floor of your dog’s house with include:
- A cold-weather dog bed
- Carpet
- Mulch
- Linens
- Rugs
- Newspaper
We’ve written an entire guide for selecting good dog house bedding before, so give it a read when you’re considering the best bedding options for your pup.
How Cold Is Too Cold For An Outdoor Dog?
It is important to note that insulation alone may not keep your dog comfortable if the temperatures drop very low. In fact, your dog may even suffer from hypothermia – which can potentially be fatal — if left outside in extremely low temperatures.
The exact temperature at which you’ll need to allow your dog to come inside and warm up varies based on a variety of factors, but the guidelines presented below will help you act in your dog’s best interest.
45 Degrees Fahrenheit
Most dogs should be comfortable outside until the temperatures dip below the 45-degree mark. At this point, you’ll want to start keeping a good eye on your dog.
Temperatures below 45 degrees may cause older or arthritic dogs to experience muscle stiffness, and short-haired or small-bodied dogs may become quite chilly.
32 Degrees Fahrenheit
Freezing temperatures can represent a threat for many dogs, especially those who have short hair, small bodies, or are simply poorly suited for cold temperatures. Hypothermia and frostbite become possible at such temperatures, and only the best-insulated and cold-tolerant dogs should be left outside in these temperatures.
20 Degrees Fahrenheit
Once temperatures fall into the 20-degree range, hypothermia becomes a very real possibility for all dogs. Small, elderly, sick, or short-haired dogs are very likely to suffer from hypothermia if left outdoors in such low temperatures, and even long-haired breeds may struggle to remain warm. Generally speaking, you’ll need to bring your pet indoors if the temperature falls to 20 degrees.
Obviously, you’ll need to use your judgment to determine when the temperatures are too low for your dog to remain outdoors.
For example, you probably don’t want to force your whippet or beagle to sleep outdoors when the temperatures are expected to dip below 45 or 50 degrees – even if your dog has a really warm dog house.
On the other hand, if the temperature is 30 degrees when you are leaving for work, but the forecast calls for sunny skies and rising temperatures, it is probably safe to let your 100-pound malamute hang out in the backyard (assuming he has a well-insulated dog house).
Just be sure to err on the side of caution – there’s rarely a compelling reason to keep your dog outdoors when the temperatures fall, and the ramifications for doing so can be quite tragic. So, just act in your pet’s best interest and consult with your vet if you are unsure of your dog’s cold tolerance.
Insulating your dog’s house is a great way to help keep Fido warm during the winter, but realize that insulation alone may not be sufficient if you live in an area with extremely low temperatures. So, it is important to monitor the temperature in the dog house regularly and always allow your pet to come inside if it gets too cold outside.
Do you prefer to build your own DIY dog house or buy one for your pooch? Do you have any other ideas for insulating a dog house? Be sure to share them with us in the comments below. We may even incorporate your suggestions into a future article update!


Leave a Comment