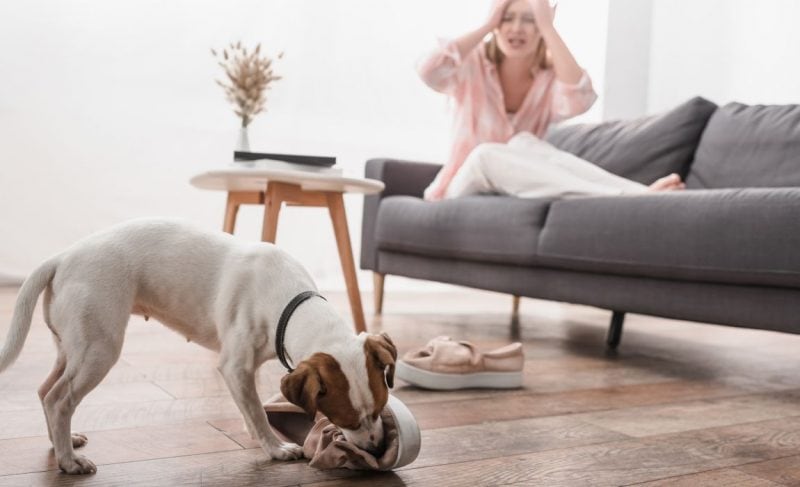
Dogs are creatures of the moment. They do what they do because they think it’s a good idea. But, sometimes, the thing they want to do isn’t actually a good idea. In fact, our dogs occasionally want to do terrible things!
As your dog’s caretaker, you know best, and teaching a “Leave it” cue is a great way to get his focus back on you and ignore whatever has his interest – especially if what he’s interested in has the potential to be unpleasant or dangerous.
Below, we will explain what “Leave it” means, why it’s an important cue to teach your dog, what you’ll need to get started, and how to teach your pooch to successfully “Leave it.”
How to Teach Your Dog to “Leave It”: Key Takeaways
- Teaching your dog to “Leave it” will help keep your pooch safer. Dogs and owners encounter any number of hazards during walks and outings, but a strong “Leave it” cue will help you prevent your dog from investigating dangerous items. It’s also helpful for day-to-day canine management.
- You don’t need many tools or supplies to teach your dog to “Leave it.” All you’ll need are some treats, a leash, and a safe place to practice. However, a treat pouch and clicker may also be useful while teaching your pup.
- Essentially, you’re going to teach your dog that he’s not allowed to mouth or investigate some things, and he should look at you instead. You’ll gradually increase the difficulty level as he improves, while offering plenty of positive reinforcement for his successes.
What Does a “Leave It” Cue Mean?
Teaching your dog “Leave it” means that you will always have a cue ready for those moments when your dog is interested in something you know you don’t want him to interact with or focus on.
A successful “Leave it” happens when your dog looks away from the object of his focus and looks at you instead. This cue is different from “Drop it” since the dog does not have the object of interest in his mouth yet.
Why Is It Important to Teach a “Leave It” Cue to Your Dog?

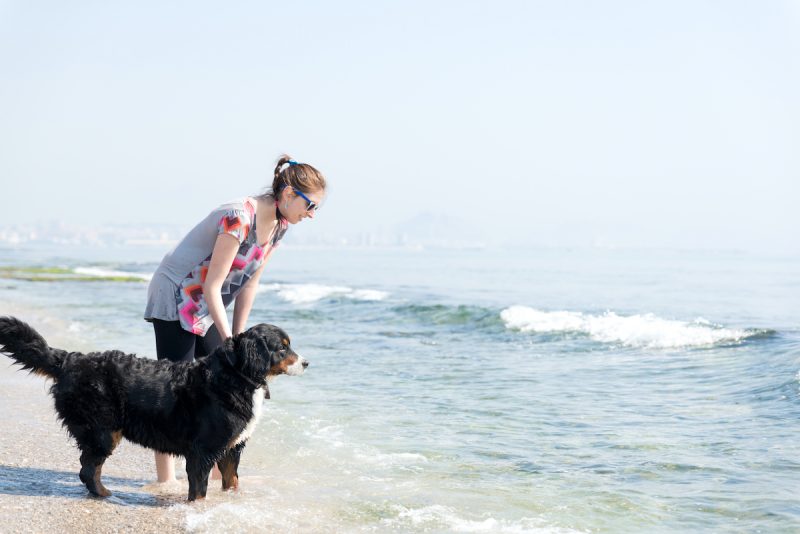
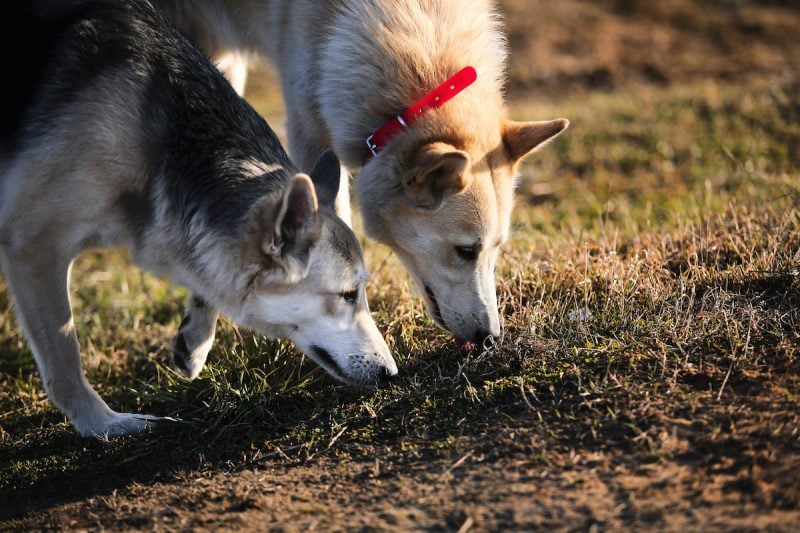
Let’s say you are out on a walk with your happy pooch, when suddenly he notices something small and floofy nearby. Something black and white.
Your dog is fascinated, and your recall cues just aren’t working. He runs over to the critter, checks it out, and eventually comes back to you reeking of skunk spray.
This exact situation has happened to me more than once! But, my pooch and I kept practicing his “Leave it” cue, and his improvement helped him learn how to succeed. This means he left other skunks alone, which helped us enjoy our walks and each other’s company so much more.
“Leave it” is a great cue to teach, and your dog will enjoy doing something right and getting rewarded for his success! It is especially useful when you want your dog to pause and bring his attention to you, since he is much more likely to comprehend the next cue you give if he’s not distracted.
Another bonus of this cue is that practicing “Leave it” with the types of forbidden items your dog is particularly interested in can help him learn a new pattern. If he finds those things, he will be more likely to leave them alone, or stop interacting with them, since he has practiced doing exactly that with you during his training sessions.
Why Not Use “No!” Instead of “Leave It?”
Since the “Leave it” cue has a distinct and rewardable moment, which is when your dog looks at you, it is different from using an interrupter like “No.”
While your dog might stop sniffing the dead thing he found if you tell him “No,” you may get upset if he doesn’t stop, and punishing your dog is not the way you want to interact with your best friend.
When you interrupt your dog with “No,” you do not tell him what you want him to do.
Teaching the “Leave it” cue using positive reinforcement, and cueing it instead of simply interrupting behavior you don’t like, can bring down your dog’s stress levels when he notices things that are interesting to him.
Once he learns how, “Leave it” can be your dog’s opportunity to refocus on you and earn a reward, rather than be told he is naughty for being curious and aware of his world.
It can also reduce behaviors like reactivity, and cueing “Leave it” gives you a chance to ask your dog to do something else (such as, come back to you) while you have his attention.
Tools and Treats: Things You Need to Teach a Dog to “Leave It”

You will need a few things in order to teach your dog a successful “Leave it” cue, including:
- Treats are an important way to reinforce your buddy when he is getting things right, and they are also great motivators that can keep your dog’s interest. To teach this cue, it helps to have both a variety of small, very tasty high-value treats, as well as at least one type of small, less interesting treat. Some pieces of your dog’s regular kibble usually work perfectly as the low-value option!
- A treat pouch is a useful way to keep your treats handily nearby, which also makes it a bit harder for your pooch to help himself to the tasty snacks.
- A hand-held clicker is a great way to audibly mark good behavior as it happens, so your dog has less guesswork during training. The “click” works as a bridge between the instant your dog achieves success and when you can hand him a treat.
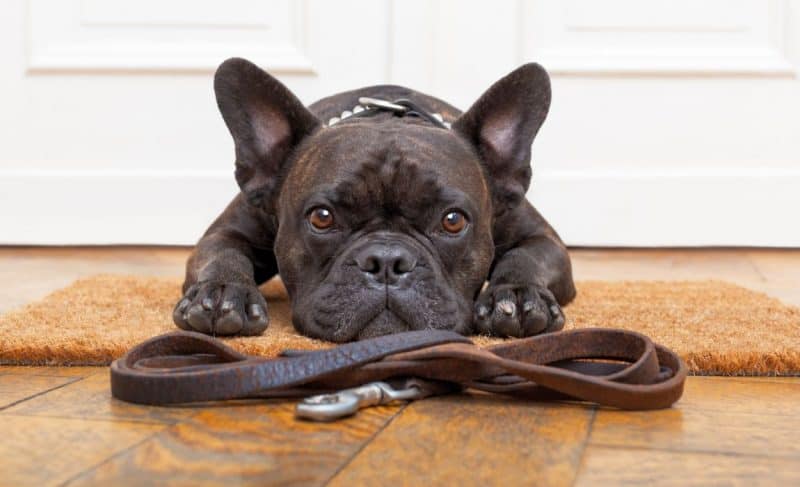
- A high-quality leash is useful for safely practicing this behavior outdoors and when on walks.
That’s all you need! Let’s get training!
Teaching Your Dog to “Leave It”: A Step-by-Step Plan
Once you have your gear and your pooch gathered, you’re ready to teach your doggo how to “Leave it!” Initially, make sure to do these sessions in a location that is familiar to your dog, with as few distractions as possible.
Step 1: Teaching “Leave It” While You Are Sitting

Teaching your dog this step means that he will begin to understand that the verbal cue for “Leave It” means to ignore a treat on the floor and look at you instead. He’ll also learn the non-verbal body language of the “hand block.”
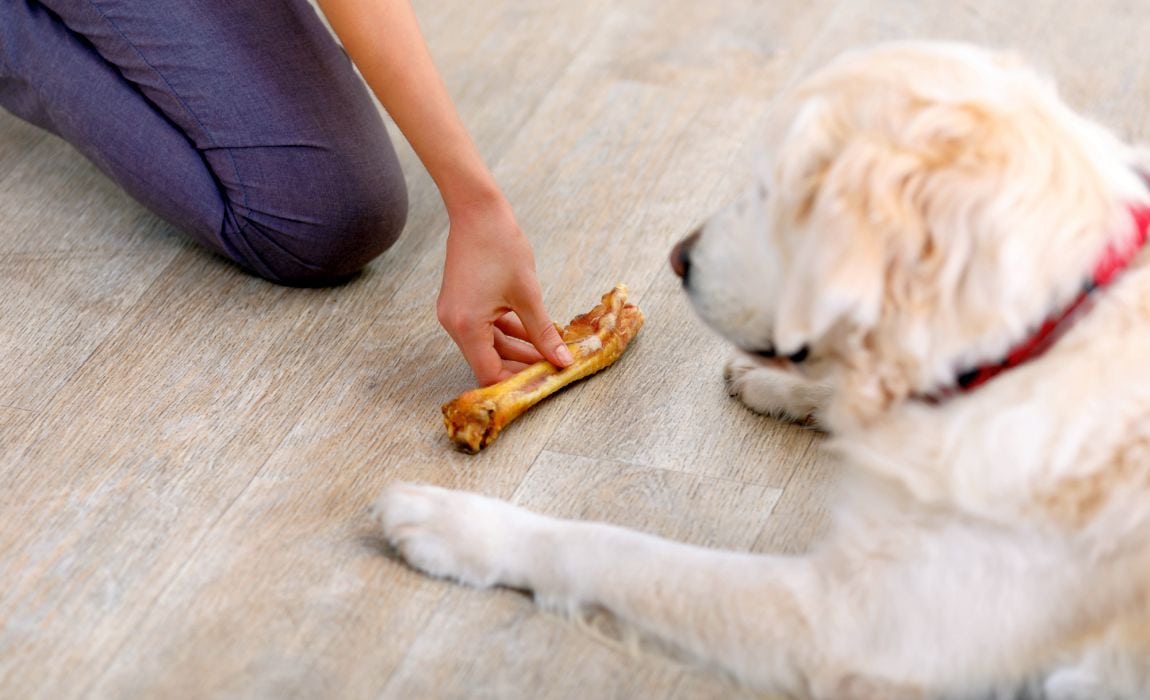
- Begin by sitting on the floor. Get one of your lower-value treats (we’ll call these “test treats”) and set it on the floor near you, and make sure your dog can see it.
- When he focuses on the test treat or begins to move toward it, say “Leave it” one time and cover it with your hand so he can’t steal or eat it. Your dog will probably sniff, lick, nibble, or paw at your blocking hand.
- As soon as he stops messing with your hand or glances up at you, click your clicker and give him one of your high-value reward treats.
- Keep practicing this step until you can set a test treat on the floor, say “Leave It,” and your dog will look at you instead of staring at or moving toward it. This step will also help your dog learn that trying to steal the test treat is much more work than simply looking at you, and that your reward treats are way better anyway!
Once your doggo gets the idea, you can increase the difficulty level by switching the test treat. Now, instead of using the low-value treat or piece of kibble as the test treat, use one of the high-value rewards. Keep a close eye on your dog and use your hand block whenever you need to in order to keep him from stealing it.
Note: Do not reward him with the test treat at any point. Keep clicking for successes and feeding him high-value reward treats from your treat pouch.
When your dog can easily look at a high-value test treat on the floor, hear “Leave it” once, and look to you for his reward without needing you to block the treat with your hand very often, you’re ready for the next step.
Step 2: Teaching “Leave It” While You Are Standing
For this step, you will teach your dog that he can look up to you to succeed. He’ll also learn about the non-verbal “foot block.”
I recommend wearing shoes for this step; some dogs get really excited about moving food and giving your foot a little protection can make teaching this step much more comfortable.
- Grab one of your low-value treats to use as a test treat, hold it a few inches above the floor, and drop it near your foot.
- Say “Leave it” once while your dog is focused on the dropped treat, and if your dog looks at the test treat or moves toward it, move your foot over the treat and put enough pressure on it so your dog cannot lick or paw the treat loose.
- If your dog stops messing with your foot, or glances at you, click and reward him with a high value treat.
Continue to practice this step, gradually adding difficulty by dropping the test treat from higher in the air. Try to make sure the test treat is close enough to you that you can block it with your foot if you need to. Dropping it on the opposite side of you from where your dog is located can help if your dog is really fast or has been swiping the goodies.
When you’re ready, increase the difficulty of this step by switching to using the high-value treats as test treats. Remember to cue “Leave it” while your dog is looking at the test treat, and to click and reward when your pooch looks at you instead of the snack on the ground.
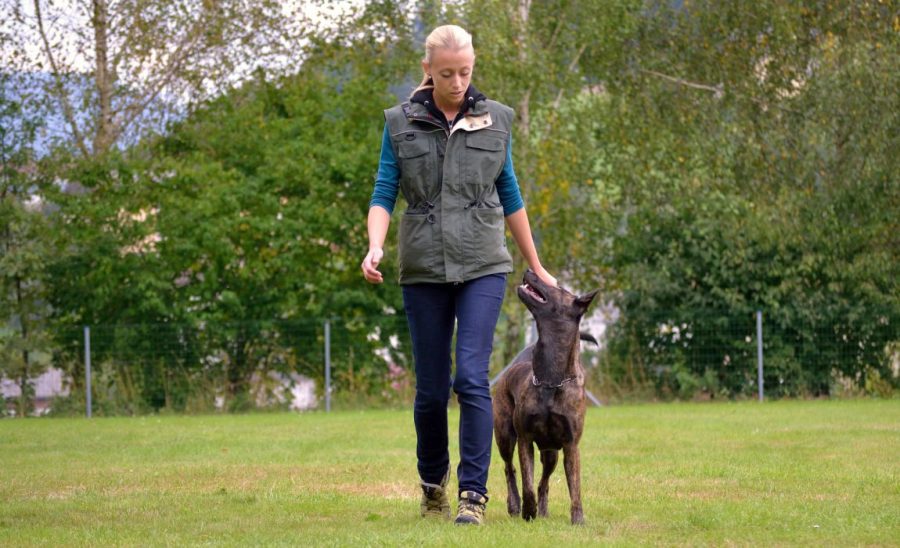
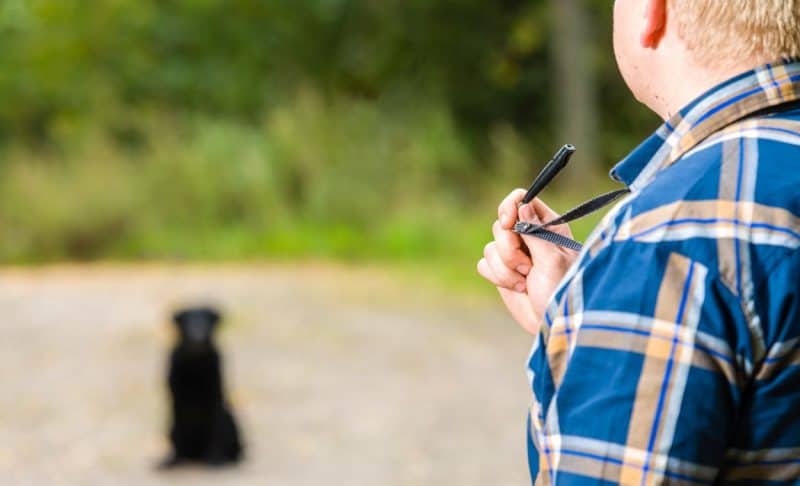
Step 3: Teaching “Leave It” While You Are Walking

This step will teach your dog that the verbal cue “Leave it” can occur without a non-verbal cue like the foot or hand block, and that he can succeed at this cue by looking at you while both of you are moving.
This will also help you practice wrangling your clicker, leash, and treats so you’re ready to use this cue while on walks.
If this setup distracts your dog a great deal, and he can’t focus on your training session at all because he’s trying to head for the door, try practicing this step just after returning home from a walk the first couple of times.
- Grab your dog’s leash and gear up your pooch just like you do when going for a walk, but don’t head out the door. Instead, stay inside your house to practice at first.
- Get a low-value test treat and put it on the floor where your dog can see it, then practice “Leave it” a couple times as you stand nearby, clicking and treating when your dog looks at you.
- When your dog can easily look at you rather than the test treat, try walking away with your dog. Be ready to block the treat with your foot if you need to.
- If your dog is constantly trying to go back and grab the test treat on the floor as you are moving away, try cueing “Leave it,” lure your dog for a step or two by holding your dog’s higher-value reward treat near his nose as you both move out of reach of the test treat, then feed your dog his reward treat. Try not to use his leash to hold him back from reaching the test treat, or you will teach your dog that he only has to leave things alone until he can drag you close enough to reach them.
- Now, add some movement around the room, moving toward and away from the test treat. Cue “Leave it” anytime your dog looks at or moves directly toward the test treat, making sure to click and reward every time he successfully looks at you instead.
Try to keep your walking movement smooth and even as you cue, click, and reward your dog. If your dog has already been working on his good leash manners, work those lessons into this practice as well, rewarding your dog for walking near you with a loose leash. This ensures that you will be close enough to use a foot block as a backup if you need to, just in case your doggo isn’t readily looking at you after hearing his verbal “Leave it” cue.
The next level up for this step is to set down two low value test treats in your indoor walking area, and practice walking toward, away from, and in closer proximity to them than the other treats you’ve previously practiced with.
Keep walking closer to the test treats until you and your dog can walk directly over them while your dog successfully ignores the treats and looks at you instead of paying attention to the test treats, or trying to steal them.
Try this step in hallways and other rooms in your house, and then in the back and front yards. Make sure the treats are easy to see initially (paper plates make great high-contrast surfaces). Then, work up to low value treats that are a surprise, or are ones that you’ve tossed out in front of you as you walk.
Keep using his verbal “Leave it” cue once for each new test treat, using your foot block if your dog is having trouble focusing on you, and clicking and rewarding when he chooses to pay attention to you instead of the test treat.
Continue to improve your dog’s “Leave it” cue by increasing the value of the test treats, practicing with other valued but off-limits objects like socks or cat food, and practicing in new and distracting locations.
Dos and Don’ts for Teaching a “Leave It” Cue
From this point on, it’s all about practice! Just try to keep the following guidelines in mind while practicing this new skill with your pupper.
Dos:
- Practice “Leave it” frequently, with lots of different objects, in lots of different places. Practice will help set your dog up to know how to respond correctly when you cue him to leave something alone, even if the test object is really exciting.
- Pay attention to situations when your dog is having trouble succeeding. For instance, if he sees another dog during a walk. Add distance between your dog and the test object and reduce distractions until he has success. Then gradually try moving closer to the distraction as your dog’s skills improve.
- Remember that living distractions are much more interesting than treats or objects that sit still. Practicing “Leave it” with dropped or rolling treats can help your dog to get more comfortable leaving things alone that are moving.
- Cue “Leave it” as soon as your dog notices something interesting. If you wait until he’s really close to the test object, or is far away from you, he may be too distracted to succeed.
Don’ts:
- Don’t overestimate your dog’s abilities. Just because he’s had a few successes during practice sessions at home does not mean he’s going to succeed every time you cue him to “Leave it.” In situations where your dog’s safety could be at risk, make sure you can physically control your dog (using a leash, or foot or hand block) so he doesn’t put himself in danger if he doesn’t respond correctly to his cue.
- Don’t use your dog’s toys when practicing this new skill. Using your dog’s toys as test objects is not ideal, since you probably want your dog to interact with his toys more than your things, or with randomly found items. If you do need to use an object for teaching “Leave it” during training practice that is interesting but slightly less valuable than food rewards, you can use your dog’s toys. But it is a good idea to play with him using those same toys after the training session so he doesn’t think he’s never supposed to play with his toy again.
Answering Your “Leave It” Questions: FAQs

Many dog caretakers have questions relating to the “Leave it” cue, so we’ve compiled a few of them here.
Do you need a clicker to teach your dog to “Leave it?”
A clicker is a useful piece of dog training equipment that can be used to help dogs learn faster with less confusion. But a short, consistent verbal marker like “Yes!” or “Good!” could also be used as an audible bridge between your dog’s correct behavioral response and receiving the treat he earned. If your dog is hearing-impaired, using a visual marker like a thumbs-up signal can also be used to mark good behavior.
What’s the difference between “Leave It” and “Drop It?”
“Leave it” is used to bring a dog’s attention back to the handler in a variety of situations when the dog may be distracted, and “Drop it” is usually cued when a dog has something in his mouth and the handler wants him to open his mouth and release the item.
Can you just say “No” instead of “Leave It?”
Since saying “No” only interrupts and punishes a dog, it does not help him know how to change his behavior and do something good instead; saying “No” can also add unnecessary stress to the situation, which could increase other problem behaviors like reactivity. Teaching your dog how to “Leave it” gives him the opportunity to change his behavior and earn a reward, which is better for continuing to build a positive, trusting relationship with your dog as well as informing him about what behavior you would prefer him to do in similar situations in the future. Teaching your dog how to respond to a “Leave it” cue can set you both up to communicate better and to help your dog learn what sorts of things you want him to always leave alone.
***
Have you taught your dog how to Leave It? What sorts of things do you try to get your dog to leave alone? What situations are better now that your dog knows how to “Leave it?”
Share your experiences (and any questions you may have) in the comments below!


Leave a Comment