There are dozens of reasons to create your own collar for your dog.
- Puppies grow out of their collars. Although collars are adjustable, pups can outgrow their initial collars more than twice by the time your pooch reaches adulthood! You probably don’t want to be flying through pricey collars, so why not make your own?
- Dog collars can break. Companies often design products to break after a certain amount of time to control business flow and keep customers coming back. As such, making your own collar gives you the power to make the collar as sturdy as you and your dog need (although if you really need something ultra-tough, you may be better off getting a chew-proof collar or harness from manufacturers specializing in such products).
- Making your own collar also ensures that your collar will be well-made (depending on what kind of materials you use), and reliably sourced, given that you are in complete control of design and construction. As long as you aren’t harming anything while making the collar, you know that no harm is happening.
- Making your own dog collar is cheap. Safe collars generally average between ten and thirty dollars, although there are definitely outliers on the more expensive end, with so-called “luxury” dog collars ranging anywhere from the mid-eighties to over one hundred dollars! Creating your own collar gives you the freedom to spend as little (or as much) money as you’d like to, given that the components that make up a collar can be incredibly cheap.
- Making your dog’s collar is also just a fun project, and gives you, as the creator, the ability to style it however you want to. Your sweet pooch doesn’t give a hoot if she’s got purple polka dots or orange paracord around her neck, but it’s always fun to glam up your pup in a safe way. Creating the collar ensures the style you want, so the collar doesn’t have to be loud if that’s not the look you’re after.
Ultimately, and possibly one of the most important factors of creating your own dog collar is that you live with that pup, so you know what she likes or doesn’t like, and you can make it as comfortable as possible.
DIY Dog Collar Patterns
Now that we’ve covered why you may want a homemade collar, let’s dig into the tutorials! The following is a selection of multiple types of DIY collars found on the web, with different styles and material costs.
1. DIY Fabric Dog Collar

The DIY Fabric Dog Collar comes from DIY Projects and offers an easy and simple approach to crafting your own dog collar with fabrics you have lying around the house.
Skill Level: Medium
The Process: This collar construction is very straightforward, and just takes a bit of time.
The first step is to lay out your material on a flat surface and measure it out. Around 31 inches is perfect for a medium-sized dog, given that the collar is adjustable. Cut two identical strips of measured fabric from the large panel of fabric, then place the strips together with the brighter side of the fabric facing in, and use a sewing machine to stitch them together. Once the strip is sewn, reversing it shows off the brighter color and hides the seams on the inside.
One of the most important steps of this collar, aesthetics-wise, is to iron it after the sewing the complete. Once it’s all ironed out, loop in the tri-glide slider, sewing down the back fabric flap, attach the buckles, and finally, the D-ring, and ta-da – collar complete!
Materials Needed:
- One 1” side release buckle
- One 1” tri-glide slider
- One 1” D-ring
- About one foot of any fabric
- Thread
- Sewing Machine / Iron / Scissors
The top three required materials can all be purchased at any hardware store, or online, while the fabric and thread can be found cheaply at any fabric store. Other necessary tools include an iron, a sewing machine (or the ability to sew), and scissors.
Side release buckles can be found for a little over a dollar, while tri-glide sliders and D-rings are generally under a dollar. This is one of the cheapest ways to make a homemade dog collar, with only a few steps and materials. Not only is this DIY dog collar incredibly cheap, but these collars can also be super comfy too–you can use silk, pure cotton, or any other cozy material that makes you and your pup happy.
Here is a video of a similar dog collar sewn from fabric with only a few minor differences.
2. DIY Leather Dog Collar

This do-it-yourself Leather Dog Collar comes from owner Makezine.com, and illustrates the steps and tools required to create a leather dog collar.
Skill Level: Advanced
The Process: The first step to making a quality leather dog collar is optional, given that it is a bit on the dangerous side.
Cutting the strips of leather is dangerous because of the thickness of the material and how sharp leather cutting tools are. If you’re accustomed to cutting leather, have at it! Otherwise, you may want to consider ordering the pieces online.
You can easily order pre-cut leather online, it just tends to be more expensive than cutting it yourself.
It’s best to cut the leather a little bit longer (or buy longer pieces) to allow for mistakes and looseness for your dog’s neck. For a professional look, be sure to trim, dye, and condition the leather to perfection before removing excess thickness on the back and punching holes.
One of the coolest parts of this collar is the fun decorations: you can use any correctly sized metal stud decorations and there are multiple ways to attach them. Give your dog some one-of-a-kind flare!
For the full tutorial, check out the DIY Leather Dog Collar Guide on Makezine.com.
Materials Needed:
- Leather strip sized about 10” longer than your dog’s neck
- Buckle, D-ring, rivets
- Leather dye
- Leather conditioner
- Decorative studs
- Leather paints
Tools Needed:
- Ruler
- Strap cutter
- Mallett
- Tack Hammer
- Leather Scissors
- Pliers
- Sewing scissors
- Skiver
- Screwdriver
- Hole punch
- Awl
- Rivet setter
- X-acto Knife
The non-leather related materials can be purchased at any hardware store, while the leather related products are easy to order online. Tandy Leather has a large selection of styles and types of leathers to choose from. In terms of the tools, many can be found at crafts stores, while specialized leather tools are easier to order online. This collar allows you to exercise a lot of creative license while enjoying the unique task of working with leather.
3. DIY Paracord Dog Collar

This Rainbow Paracord Dog Collar is a DIY dog collar from Hands Occupied. This collar offers owners to be creative with colors while maintaining a sturdy structure and a project price point that won’t break the bank.
Skill Level: Medium
The Process: This paracord collar has a pretty easy setup, even if 100% of the success relies on your ability (let’s hope all that practice tying those friendship bracelets in middle school will finally come in handy) to braid and tie knots.
First, you’ll need to fold your length of paracord exactly in half and slip it through either end of a side release buckle. Loop the other end through so it tightens and fastens. Thread on the other half of the buckle and get ready to braid!
Tape or hold the middle two strands down and proceed to alternate looping, adjusting, and pulling. Once you reach the middle of the collar, simply add in a ring for your dog’s ID tag. You can use your dog’s old collar to compare lengths as needed. 25 feet of 550 paracord generally costs under five dollars, so this is a pretty cheap project!
Materials Needed:
- Rainbow (or your choice of colors) 550 paracord
- Side release buckle
- Lighter/Scissors
- Key Ring
For the most part, this homemade dog collar is pretty straightforward and leaves your pooch looking adorable. The only tricky task is the knotting and braiding, which can take a little bit of practice to master. The good news is that even if you mess up, the materials are fairly cheap and can be woven with any assortment of colors. The final result is sturdy, beautiful, and handmade with love!
For detailed photos are further instructions, check out the DIY Paracord Dog Collar on HandsOccupied.com
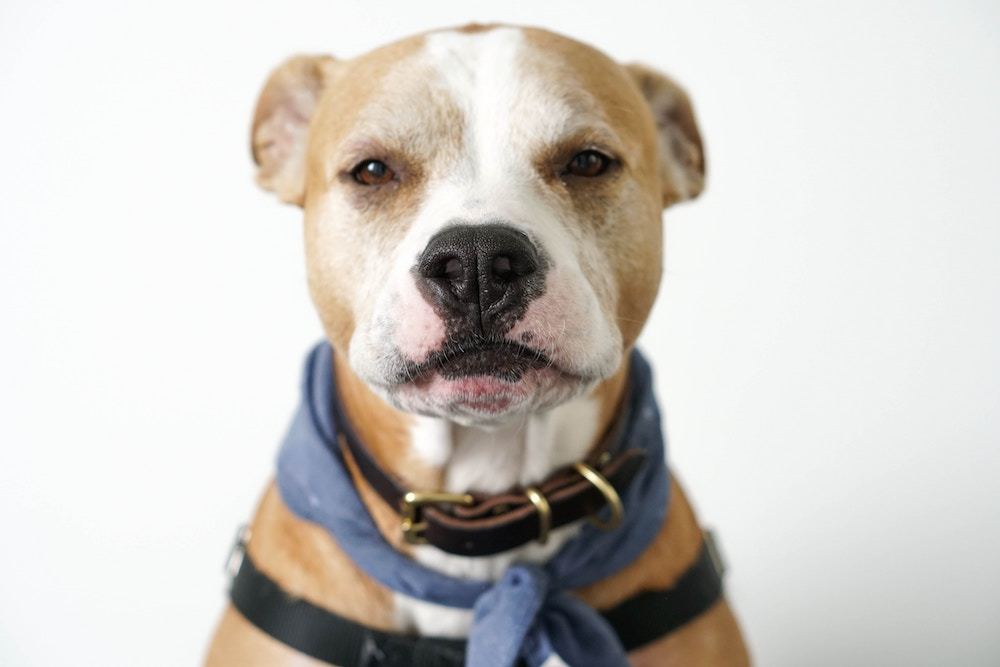
4. The No-Sew DIY Bandana Dog Collar

This easy-peasy DIY no-sew dog collar bandana comes from Pretty Fluffy, a website devoted to DIY projects.
This is a great DIY dog collar due to the possibility for funky patterns as well as the simple construction. The caveat for this design is that it requires a regular collar as well–the bandana attaches around the original collar and acts as a fashionable cover.
It’s easily made from one bandana or fabric scraps, given that your dog already has a collar. This makeshift DIY bandana collar cover is so neat because it’s cheap, easy, and ethical. Your dog will look as snazzy as you want him to be.
Skill Level: Easy
The Process: This DIY bandana collar is pretty straightforward. The trickiest part is simply getting your measurements right–you’ll want to measure and then sketch out a triangle ten inches wide by five inches high.
Simply snip out your triangle, and then use your first piece to act as a guide when you create an identical second triangle for the back. Iron the two pieces together, colorful side out, and then apply hemming tape as a precaution. Iron until satisfactorily secured, grab your collar and fold over.
Lastly, stick on a final piece of hemming tape, iron one more time, and–voila! You have yourself a darn fine, beautiful new collar cover!
The Materials:
- Fabric for the collar (at least 14×14 inches)
- Hemming tape (this can be found at any craft store)
- Scissors
- Iron and an ironing surface
- Dog collar
This bandana dog collar is a fan favorite because of how simple it is in design and construction, yet it still manages to be fashionable. It’s a fun craft that even the kids can help out with!
For all the details, check out the DIY No Sew Bandana Collar at Prettyfluffy.com.
***
Ultimately, DIY dog collars are a great way to save a little money (depending on the design), have fun, and create something you’re proud of for your pooch!
However, if you’re not really in the crafty mood, be sure to also check out our collection of the coolest, most unique dog collars and leashes around for adding some personal flair!
Have you ever made a DIY dog collar for your canine? How’d it go? Any great DIY dog collar guides we missed? Let us know in the comments below!
Looking for more dog DIY inspiration? See our guides on:


Leave a Comment